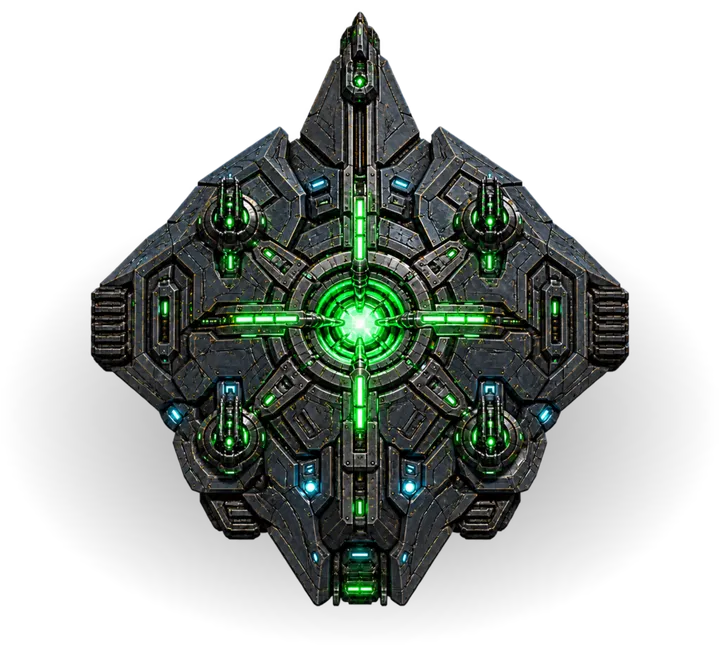
02 Field Guide // Hostiles

Enemies & Bosses

The enemy is the Machines. Ground Machines follow the route you build and re-plan around every tower; aircraft ignore it and fly at your Firewall. Bosses join from wave 10, and from wave 50 every battlefield has its own Mega Boss.

On the ground
They walk your route, so every tower you build changes where they go.
In the air
The Drone, Hive, Gnat, Hunter, and Surveyor ignore your route and fly toward the Firewall.
Base values
Stats below are the Field Guide’s base values: hit points scale by wave and difficulty.

01 Threat level 1 // Machines

Fourteen Machines, in the order they arrive

The regular enemies. Each one tests a different part of your defense, from raw speed to armor, stealth and swarms.

  1. M01 Wave 1

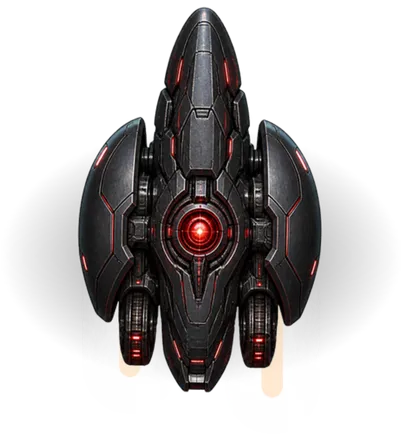
    Runner, rendered from the game: a sleek black craft with a glowing red eye and twin white thruster trails.

    Runner

    Fast • Ground

    A fast ground enemy with little health.

    How to counter

    Razorwire slows it, and a Sentry Post brings it down quickly.

    Durability [log]
    Mobility
    Bounty
    4G
    Size
    0.72 tiles
    Field Guide entry
    • Role: Fast advance Moves quickly enough to expose gaps between tower ranges.
    • Tip: Best response Razorwire slows it for efficient Sentry fire.
    • Warning: Late-wave health Extra HP starts at +5% on W120 and keeps growing gradually.
    Abilities
    Basic fast attacker with no armor or special ability. Extra HP starts at +5% on W120 and keeps growing gradually.
    Advice
    Overlap Sentry ranges along the route so Runners stay under fire.
    Tactics
    Do not let early speed expose gaps between tower ranges.
  2. M02 Wave 3

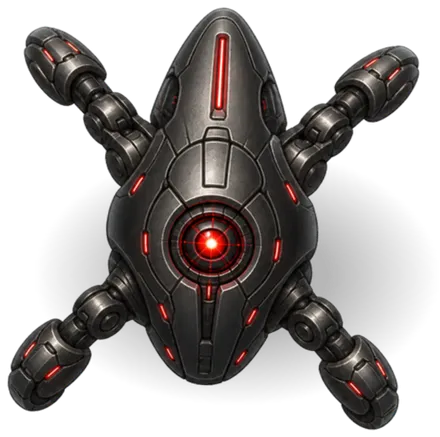
    Skitters, rendered from the game: a round black body with a red eye and four jointed legs.

    Skitters

    Swarm • Ground

    Arrives in fast, dense packs.

    How to counter

    Flak Nest Tower splash and EMP Tower pulses clear clustered bodies quickly.

    Durability [log]
    Mobility
    Bounty
    1G
    Size
    0.56 tiles
    Field Guide entry
    • Role: Swarm Dense groups can overwhelm single-target towers.
    • Tip: Best response Flak splash and EMP pulses clear clustered bodies.
    • Warning: Late-wave health Extra HP starts at +5% on W120 and keeps growing gradually.
    Abilities
    Arrives in dense, fast clusters and rewards only 1G each. Extra HP starts at +5% on W120 and keeps growing gradually.
    Advice
    Use Flak to hit the whole group. EMP pulses help clear packs near your Towers.
    Tactics
    Single-target towers can be overwhelmed even though each unit is fragile.
  3. M03 Wave 5

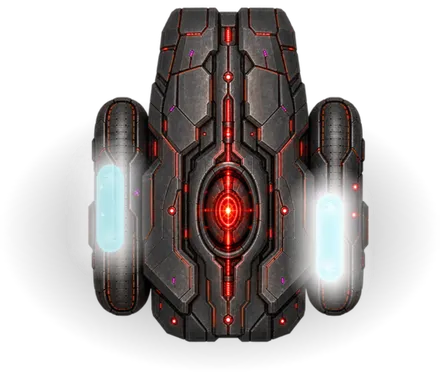
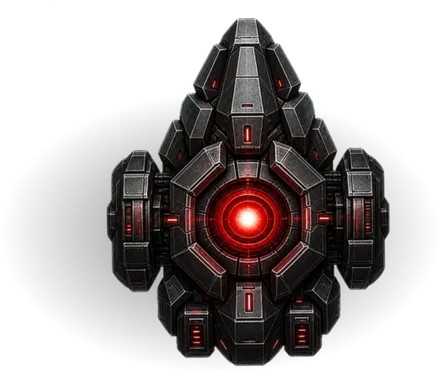
    Treads, rendered from the game: a slab-sided armored hull with a red core and glowing white track pods.

    Treads

    Heavy • Ground

    • Armor 2/hit

    A slow armored enemy that absorbs light hits.

    How to counter

    Direct Mortar Team Tower and Arc Battery Tower damage; control effects keep it inside kill zones.

    Durability [log]
    Mobility
    Bounty
    8G
    Size
    0.8 tiles
    Field Guide entry
    • Role: Heavy chassis Slow, durable pressure absorbs sustained tower fire.
    • Tip: Best response Concentrate Mortar or Arc damage inside a control zone.
    • Warning: If unchecked Soaks up fire while faster enemies advance around it.
    Abilities
    Moves slowly, takes far more damage to destroy than a Runner, and absorbs 2 damage from each direct hit.
    Advice
    Use Mortars or Arc Batteries for heavy hits. Slow it inside overlapping Tower ranges.
    Tactics
    Its low speed makes concentrated damage more valuable than chasing range.
  4. M04 Wave 7

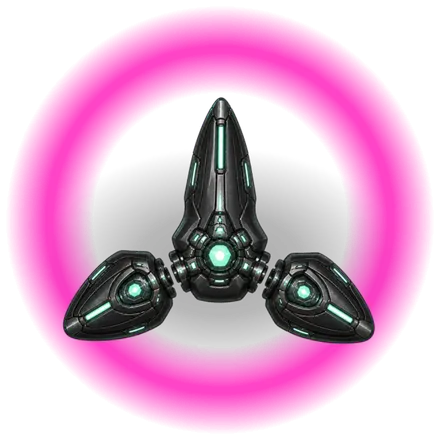
    Splitter, rendered from the game: a three-pronged dark frame with a teal core, ringed by a magenta instability glow.

    Splitter

    Spawner • Ground

    Splits into fast fragments when destroyed.

    How to counter

    EMP Tower suppression prevents the split; Flak Nest Tower cleans up spawned fragments.

    Durability [log]
    Mobility
    Bounty
    3G
    Size
    0.62 tiles
    Field Guide entry
    • Critical: Splits on death Creates 2 faster enemies when destroyed.
    • Critical: Required response EMP suppression prevents the split.
    • Warning: Late-wave health Extra HP starts at +5% on W120 and keeps growing gradually.
    Abilities
    On death, creates 2 faster fragments unless its ability is suppressed. Extra HP starts at +5% on W120 and keeps growing gradually.
    Advice
    Place EMP along its route to prevent the split. Keep Flak nearby to catch any fragments.
    Tactics
    Expect more targets when the first health bar reaches zero.
  5. M05 Wave 15

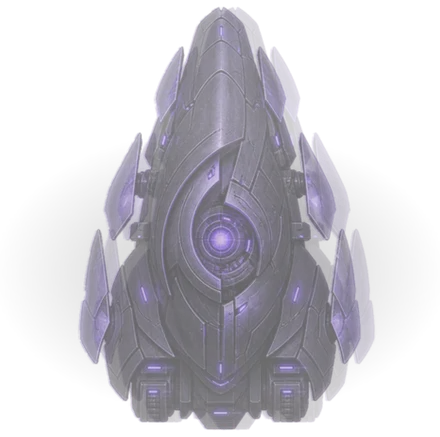
    Cloaker, rendered from the game: a dark violet teardrop hull, half-lost in shadow, with a faint violet eye.

    Cloaker

    Stealth • Ground

    Hides from Towers until it gets very close.

    How to counter

    Spotlight Tower reveals it across the full detection field; towers can detect it at point-blank range.

    Durability [log]
    Mobility
    Bounty
    6G
    Size
    0.72 tiles
    Field Guide entry
    • Critical: Hidden at range Normal towers see it only at point-blank range.
    • Critical: Reveal with Spotlight restores normal targeting across its field.
    • Warning: If unchecked Passes through long-range defenses unnoticed.
    Abilities
    Hidden from normal tower targeting beyond 0.9 tiles.
    Advice
    Place a Spotlight over the route so nearby damage Towers can see and shoot it.
    Tactics
    An uncovered Cloaker can pass through long-range defenses unnoticed.
  6. M06 Wave 22

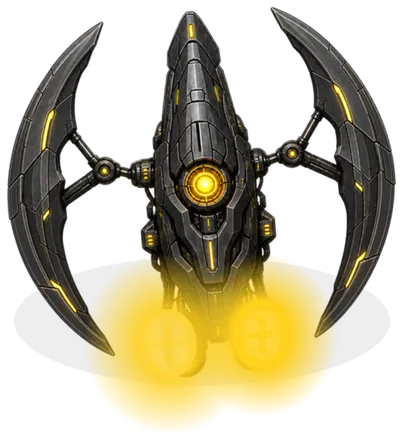
    Drone, rendered from the game: a narrow dark craft with crescent wings, a yellow core and two bright yellow engine glows.

    Drone

    Airborne • Swarm

    • Airborne

    Drones fly straight to the Firewall, ignoring your route.

    How to counter

    Flak Nests are your main defense against Drones. EMP Towers and level-4 Spotlight anti-air guns can also hit them. Unified Targeting temporarily lets ground towers engage aircraft.

    Durability [log]
    Mobility
    Bounty
    1G
    Size
    0.78 tiles
    Field Guide entry
    • Critical: Airborne swarms Ignores ground routes and Razorwire. Extra Drones start at +10% on W120 and keep increasing gradually.
    • Critical: Required response Flak, EMP and level-4 Spotlight guns can attack it.
    • Warning: Late-wave health Extra HP starts at +5% on W120 and keeps growing gradually.
    Abilities
    Flies directly toward the base, ignores terrain, routes and Razorwire, and receives 25% of normal wave HP scaling. Extra Drones start at +10% on W120 and keep increasing gradually. Extra HP starts at +5% on W120 and keeps growing gradually.
    Advice
    Place Flak Nests along their flight path, with overlapping coverage.
    Tactics
    Maintain overlapping anti-air coverage before wave 22.
  7. M07 Wave 26

    Breacher, rendered from the game: a squat armored block with a glowing red core and heavy side pods.

    Breacher

    Saboteur • Ground

    • Armor 2/hit

    Stops beside a Tower, charges an attack, then damages it.

    How to counter

    It damages Towers once its attack is charged. EMP Towers interrupt and suppress the charge. Flash Freeze pauses the attack window; heavy direct hits minimize its 2 armor.

    Durability [log]
    Mobility
    Bounty
    10G
    Size
    0.82 tiles
    Field Guide entry
    • Critical: Damages towers Charges an attack against a nearby defense.
    • Critical: Best response EMP interrupts the attack and suppresses another attempt.
    • Note: Alternative Flash Freeze stops the attack window temporarily.
    Abilities
    Channels for 2.2s beside a tower, then damages one target before cooling down.
    Advice
    Use EMP to interrupt its attack. Flash Freeze buys your damage Towers more time.
    Tactics
    Keep critical Towers away from exposed route edges. On Evacuation’s right shelter, ringed Line Cutters also cut Grid Tap’s power at the Tower they strike.
  8. M08 Wave 30

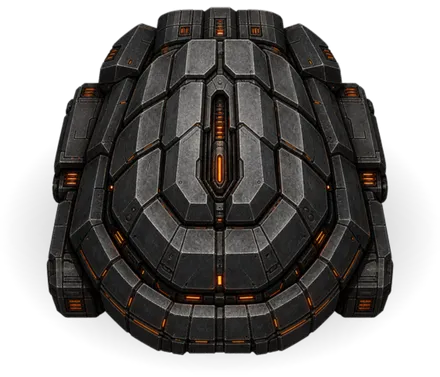
    Riot, rendered from the game: a rounded shell of layered grey armor plates with a slit of orange light.

    Riot

    Splash Resistant • Ground

    • Armor 3/hit

    Resists explosions, so splash damage is much less effective.

    How to counter

    Use direct Sentry, Standard Mortar or Arc damage. Flak, Cluster Barrage, Bomb and Airstrike use resisted splash damage.

    Durability [log]
    Mobility
    Bounty
    14G
    Size
    0.84 tiles
    Field Guide entry
    • Critical: Splash resistant Takes 70% less damage from splash attacks.
    • Tip: Use direct damage Sentry, Standard Mortar and Arc avoid splash resistance.
    • Warning: Avoid Flak, Cluster Barrage, Bomb and Airstrike suffer splash resistance.
    Abilities
    Deflection reduces true splash damage by 70%, leaving only 30%; its 3 armor still reduces direct hits.
    Advice
    Use Sentries, Mortars or Arc Batteries for direct hits. Save explosions for other enemies.
    Tactics
    Do not mistake high-cost explosions for an efficient counter.
  9. M09 Wave 40 (Hard 40 · Normal 40 · Relaxed 40)

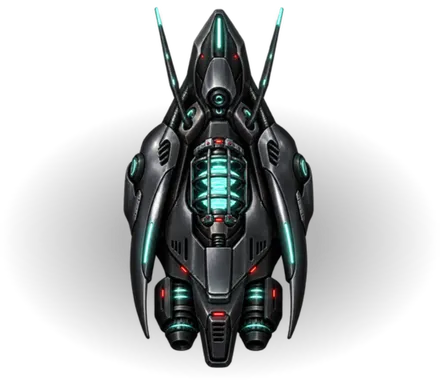
    Jammer, rendered from the game: a slim black hull with a teal-lit coil at its centre and twin antennae.

    Jammer

    Countermeasure • Ground

    • Armor 2/hit

    Disables EMP Towers. In Hard mode, it also blacks out nearby Spotlights.
    How to counter

    Other Towers can destroy it during the visible targeting link. Heavy direct hits minimize its 2 armor. A blacked-out Spotlight restores immediately when no Jammer remains in range.

    Durability [log]
    Mobility
    Bounty
    27G
    Size
    0.82 tiles
    Field Guide entry
    • Critical: Counter-pulse Charges a visible link to one nearby EMP Tower.
    • Critical: Hard mode Its 3.5-tile field disables nearby Spotlights until it leaves or dies.
    • Tip: Best response Destroy the Jammer with other towers before the link completes.
    Abilities
    Targets one EMP Tower within 3.5 tiles, charges for 0.9s, then locks it offline for 2.4s. In Hard mode, the same interference field continuously blacks out nearby Spotlights.
    Advice
    Cover it with damage Towers before it disables your support. EMP cannot interrupt it.
    Tactics
    EMP pulses still damage it but cannot interrupt its counter-pulse. Focus other Towers on it before detection collapses.
  10. M10 Wave 56

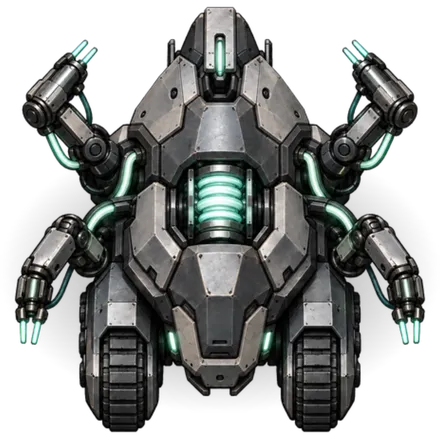
    Mender, rendered from the game: a grey tracked walker with two arms and a cyan-lit coil in its chest.

    Mender

    Repair Support • Ground

    • Armor 2/hit

    Repairs a nearby wounded ground enemy through a pale energy link.

    How to counter

    EMP breaks the repair link. It cannot repair itself, other Menders, aircraft or bosses.

    Durability [log]
    Mobility
    Bounty
    24G
    Size
    0.94 tiles
    Field Guide entry
    • Critical: Repair link Restores one wounded ground escort at a time.
    • Tip: Best response EMP breaks its repair link. Focus Fire marks it ahead of escorts.
    • Note: Finite reserve Cannot repair itself, other Menders, aircraft or bosses.
    Abilities
    Links to one wounded ground escort within 2.6 tiles. Each 1.4s charge restores 4% of its target’s maximum health, until a finite repair reserve is spent.
    Advice
    Use EMP to interrupt repairs, then concentrate fire on the Mender.
    Tactics
    Destroy the Mender before spending sustained damage on its escorts.
  11. M11 Wave 106

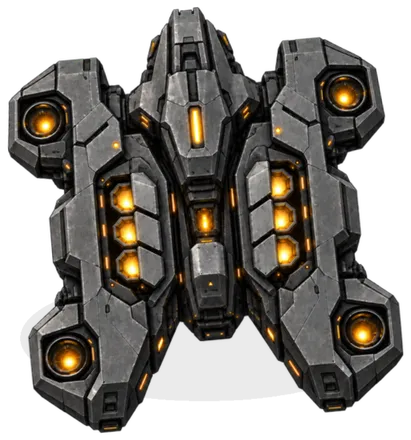
    Hive, rendered from the game: a wide grey carrier of three hulls studded with glowing amber launch bays.

    Hive

    Swarm Carrier • Air

    • Airborne

    A slow aircraft that releases large clouds of tiny Gnats.

    How to counter

    Flak, EMP, level-4 Spotlight airburst and Unified Targeting damage its hull. EMP also damages Gnats, but does not stop launches. Flash Freeze pauses launch charging.

    Durability [log]
    Mobility
    Bounty
    36G
    Size
    1.3 tiles
    Field Guide entry
    • Critical: Finite cargo 4 launches: 16 Gnats initially; cargo doubles from W120.
    • Tip: Best response Destroy the carrier early; EMP does not stop launches.
    • Warning: Released swarms Gnats already airborne survive their carrier.
    Abilities
    Up to 4 launches, initially 16 Gnats each. From Wave 120, launches double to 32 and grow to 40 Gnats. Each launch has a 0.8s warning. EMP does not stop launches; it stops launching near the Firewall.
    Advice
    Destroy the Hive before it empties its launch chambers. Overlap Flak coverage for the Gnats.
    Tactics
    Destroy it early to deny remaining launches. Released Gnats survive their carrier.
  12. M12 Spawned by Hive

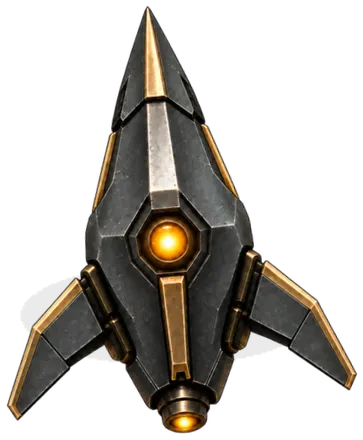
    Gnat, rendered from the game: a small arrow-shaped dart with gold trim and an amber core.

    Gnat

    Micro-Drone • Swarm

    • Airborne
    • Spawned

    Tiny, fragile aircraft that scatter and weave toward the Firewall.

    How to counter

    Flak splash clears clustered Gnats. EMP and level-4 Spotlight airburst also hit aircraft; Razorwire needs Unified Targeting.

    Durability [log]
    Mobility
    Bounty
    1G
    Size
    0.46 tiles
    Field Guide entry
    • Role: Weaving flight Scatter clouds and ribbons advance toward the Firewall.
    • Tip: Best response Overlapping Flak coverage catches scattered groups.
    • Warning: Late-wave health Extra HP starts at +5% on W120 and keeps growing gradually.
    Abilities
    Fans out immediately from four Hive launch bays, then scatters into clouds and weaving ribbons. Flies around ground routes while always advancing toward the Firewall. Extra HP starts at +5% on W120 and keeps growing gradually.
    Advice
    Use overlapping Flak coverage to catch the swarm as it spreads.
    Tactics
    Each Gnat is fragile, but every escape costs integrity. Cover the whole approach.
  13. M13 With Wave 141 · Support Hunt

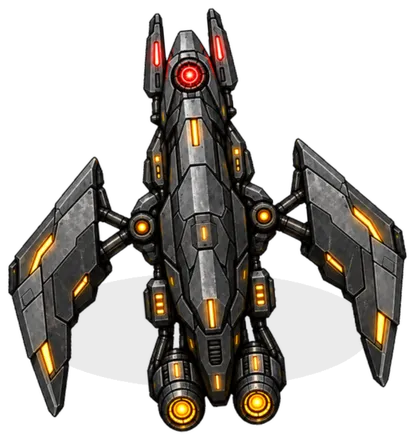
    Hunter, rendered from the game: a long dark gunship with swept armored wings, amber running lights, twin engine glows and a red eye at its nose.

    Hunter

    Support Hunter • Air

    • Airborne

    An aircraft winds between support Towers, showing a countdown before each strike.

    How to counter

    EMP or Time Rewind permanently breaks its target lock. Flash Freeze delays it. Selling or moving the marked Tower skips that attack. Brace blocks Tower damage while active.

    Durability [log]
    Mobility
    Bounty
    45G
    Size
    1.1 tiles
    Field Guide entry
    • Critical: Winding patrol Up to 3 distinct support Towers along its flight.
    • Warning: Each warned strike 4s charge; at most 25% maximum Tower health.
    • Tip: Break the lock EMP, Time Rewind or removing the marked Tower denies its strike.
    Abilities
    Winds between up to 3 Spotlights, EMPs or Relays. Each gets a 4s countdown, then one strike capped at 25% maximum Tower health. It never repeats a target, then heads for the Firewall.
    Advice
    Protect the marked Tower. EMP or Rewind breaks the lock; Freeze buys time for anti-air fire.
    Tactics
    Keep overlapping Flak coverage around support Towers. Focus Fire can direct eligible anti-air onto the Hunter before its countdown ends.
  14. M14 With Wave 81 · Air Assault

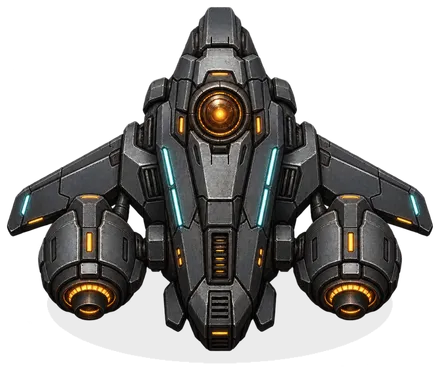
    Surveyor, rendered from the game: a broad dark craft with two round engine pods, a glowing amber eye and cyan light strips along its hull.

    Surveyor

    Patrol Support • Air

    • Airborne

    Patrols above the ground route, shields nearby Machines and occasionally cuts across a bend.

    How to counter

    EMP interrupts shield scans and strips escort shields, but does not stop shortcuts. Flak, armed Spotlights and Unified Targeting can attack the aircraft. Freeze pauses its patrol and scan.

    Durability [log]
    Mobility
    Bounty
    18G
    Size
    1.12 tiles
    Field Guide entry
    • Warning: Warned shortcuts Up to two short cuts across bends; EMP does not stop them.
    • Critical: Shield scan Protects one ground escort at a time. Shields expire and cannot stack.
    • Tip: Best response Flak along the patrol route; EMP interrupts scans and strips shields.
    Abilities
    Follows the ground route and takes up to 2 warned shortcuts across bends. Scans one ground escort for 1.2s to grant a 5s shield: 15% maximum health, capped at 120 HP. Up to 3 scans; each escort can be shielded once.
    Advice
    Cover its patrol with Flak. EMP stops shield scans and strips shields; shortcuts still happen.
    Tactics
    Cover the winding route and shortcut destinations with anti-air. Destroy the Surveyor before it shields the column. It follows the final approach to the Firewall.

02 Threat level 2 // Bosses

Four bosses

Bosses arrive from wave 10. Each has a signature move, from tower strikes to cloaking, and a counter the Field Guide spells out.

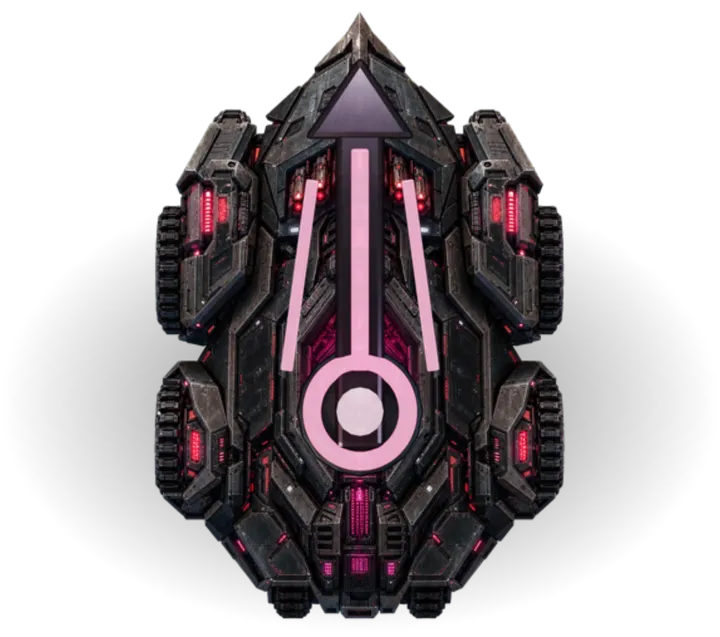
  1. Line Breaker, rendered from the game: a long dark hull with a pink-lit ram spine ending in a glowing ring.
    Boss Wave 10

    Boss 01 / 04 Debut Wave 10

    Line Breaker

    Boss • Tower Breaker

    Stops at several points along the route to strike nearby Towers.

    What it does
    At the beginning, middle and end of its route, channels for 4.5s and strikes up to 2 towers within 2.4 tiles.
    How to counter
    Line Breakers will damage your Towers. EMP Towers, Freeze, Grapple and focused direct damage stop its advance.
    Advice
    Use EMP to interrupt its strike. Brace protects your Towers if the attack gets through.
    Tactics
    Its bounty starts at 150G to rebuild part of the line. From Wave 200, each Mega Boss encounter adds an elite lieutenant 10 combat seconds after the Mega Boss arrives. Lieutenants have 50% extra health and rotate REDLINE, WARLINK, Phase Cloaker, then Line Breaker. Defeat the Mega Boss and lieutenant to earn their combined bounty and one Mega Bomb reward. An escaped boss forfeits that encounter reward, and a lieutenant that reaches the Firewall costs 2 integrity.
    • Critical: Three strike windows Can attack once in each route third, up to three times.
    • Critical: Best response EMP interrupts the strike; Freeze and Grapple buy time.
    • Tip: Recovery bounty Awards at least 150G to rebuild part of the line.
    Durability [log]
    Mobility
    Bounty
    Scales with wave
    Size
    1.12 tiles
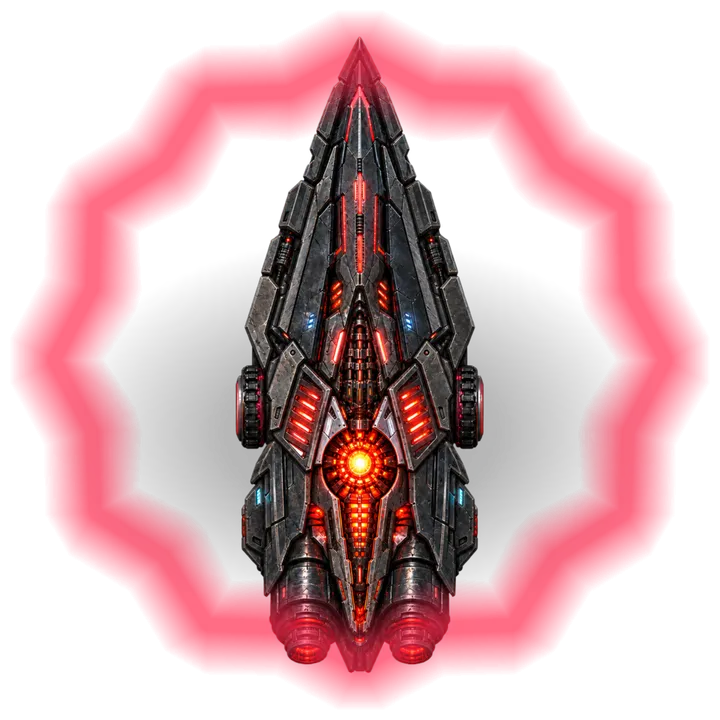
  2. Redline, rendered from the game: a needle-thin black hull striped with red light around a red core.
    Boss Wave 20

    Boss 03 / 04 Debut Wave 20

    Redline

    Boss • Overdrive

    Speeds up, then slows down and becomes vulnerable while venting.

    What it does
    Accelerates for 8s to 170% speed, then vents for 3s at 55% speed and takes 150% damage.
    How to counter
    Slow it during the red HEAT climb, then focus fire during the yellow VENT window. EMP forces the same cooling slowdown and vulnerability.
    Advice
    Slow it while it accelerates. Use your strongest attacks when the yellow VENT warning appears.
    Tactics
    REDLINE is always targetable. Save burst damage for the explicit VENT — 150% DMG readout. From Wave 200, each Mega Boss encounter adds an elite lieutenant 10 combat seconds after the Mega Boss arrives. Lieutenants have 50% extra health and rotate REDLINE, WARLINK, Phase Cloaker, then Line Breaker. Defeat the Mega Boss and lieutenant to earn their combined bounty and one Mega Bomb reward. An escaped boss forfeits that encounter reward, and a lieutenant that reaches the Firewall costs 2 integrity.
    • Critical: Overdrive Accelerates for 8 seconds until it reaches 170% speed.
    • Critical: Vent window Slows to 55% and takes 150% damage for 3 seconds.
    • Tip: Best response Slow the heat climb; EMP or burst the yellow vent state.
    Durability [log]
    Mobility
    Bounty
    Scales with wave
    Size
    1.22 tiles
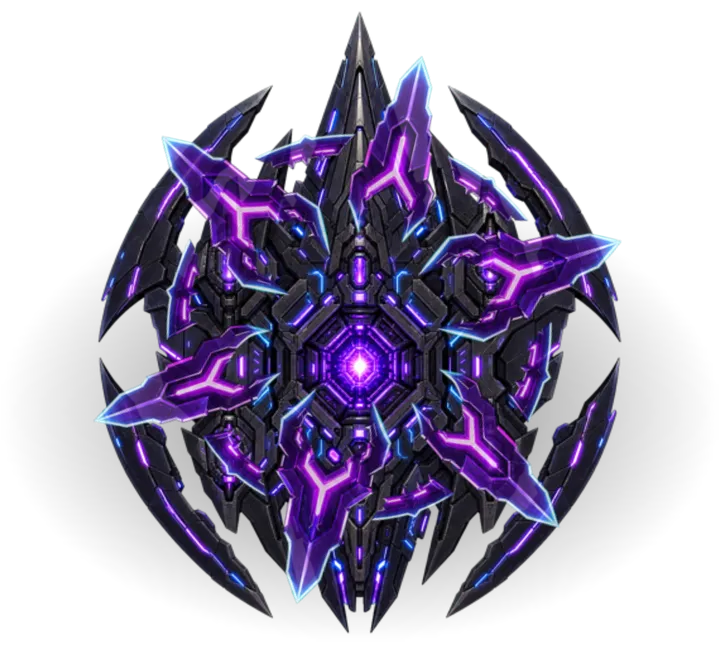
  3. Phase Cloaker, rendered from the game: a violet crystalline starburst of blades around a glowing core.
    Boss Wave 25

    Boss 04 / 04 Debut Wave 25

    Phase Cloaker

    Boss • Phasing

    Regularly cloaks, avoiding attacks while hidden.

    What it does
    Cycles 5s visible / 4s cloaked. While unrevealed and cloaked it ignores ordinary attacks and hostile effects; Mega Bomb still hits it.
    How to counter
    A Spotlight reveals it and lets every Tower attack normally. Without one, save burst damage for its visible windows.
    Advice
    Use a Spotlight to keep it targetable. Without one, save strong attacks until it becomes visible.
    Tactics
    Cloaked: Freeze / Rewind blocked. Other enemies still use the charge. Mega Bomb bypasses cloak. From Wave 200, each Mega Boss encounter adds an elite lieutenant 10 combat seconds after the Mega Boss arrives. Lieutenants have 50% extra health and rotate REDLINE, WARLINK, Phase Cloaker, then Line Breaker. Defeat the Mega Boss and lieutenant to earn their combined bounty and one Mega Bomb reward. An escaped boss forfeits that encounter reward, and a lieutenant that reaches the Firewall costs 2 integrity.
    • Critical: Phases out Unrevealed cloak blocks ordinary attacks; Mega Bomb still hits.
    • Critical: Required response Spotlight reveals it and restores full targetability.
    • Note: Alternative Burst it during visible windows after the warning.
    Durability [log]
    Mobility
    Bounty
    Scales with wave
    Size
    1.08 tiles
Threat level 3 // Critical

03 Mega Bosses

Seven Mega Bosses. One for every battlefield.

Each battlefield has its own Mega Boss, with a mechanic all its own. They arrive from wave 50.

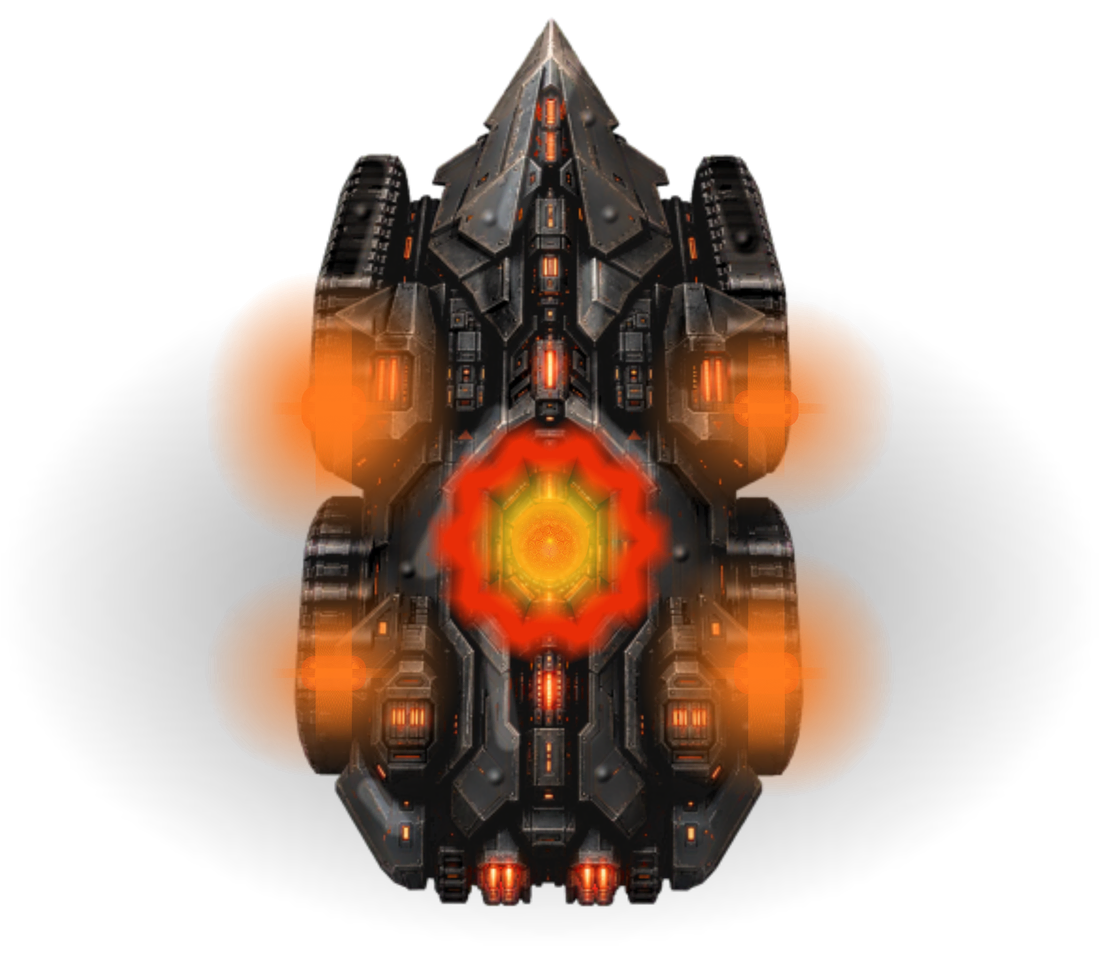
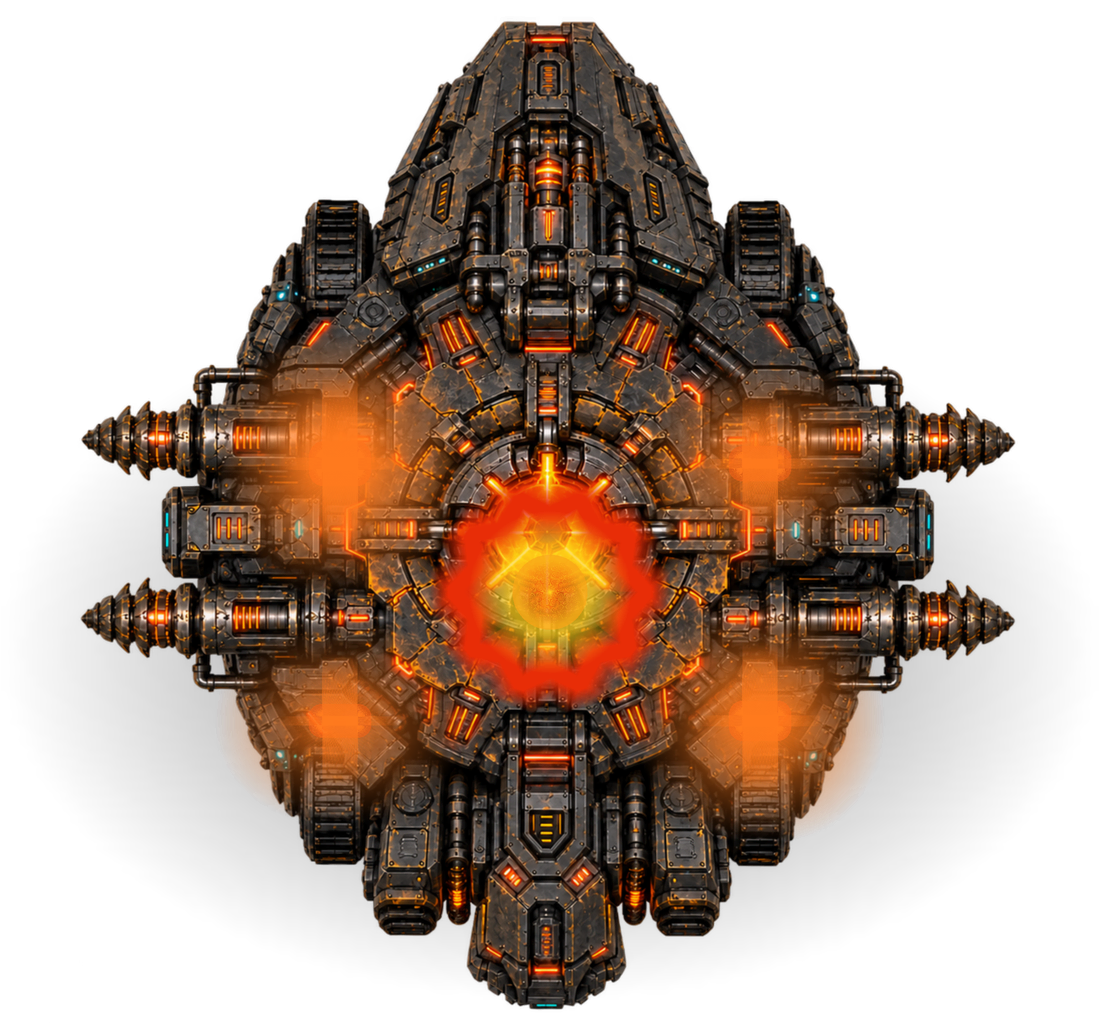
Scorch Colossus, rendered from the game: a massive dark hull with a burning orange core and four flaming vents.
Mega Boss Open Field

Mega Boss 01 / 07 Debut Wave 50

Scorch Colossus

Mega Boss • Scorch

Burns nearby Towers as it advances.

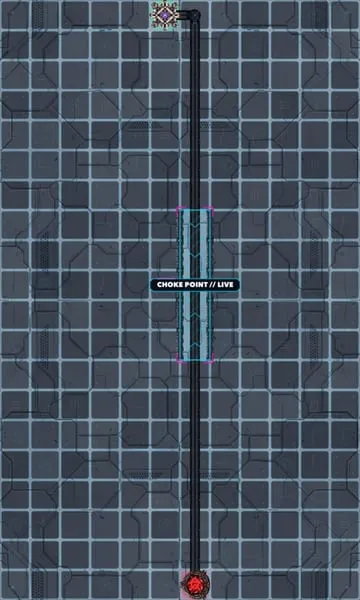
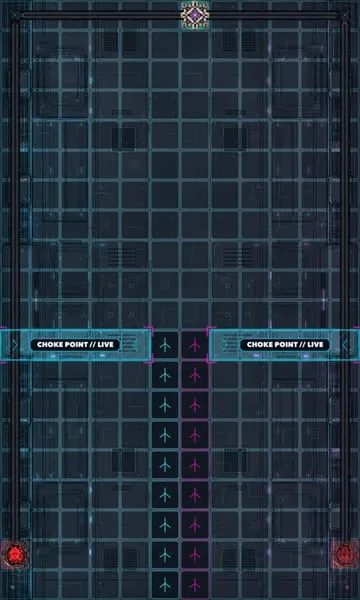
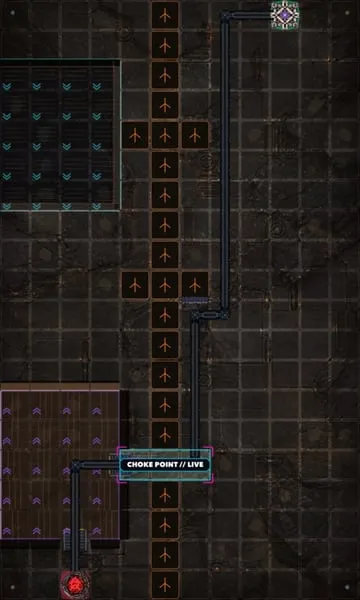
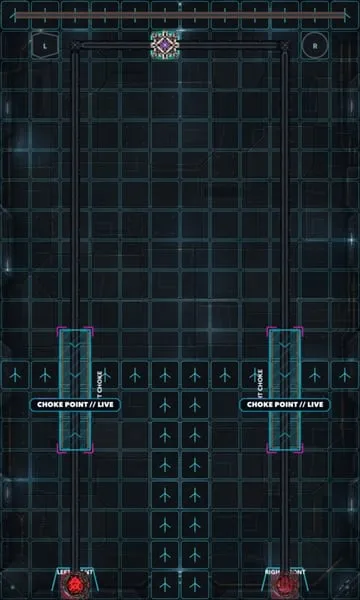
Open Field battlefield, captured from the game: the empty board with its route and choke points.

Guards battlefield 01

Open Field

Testing Ground · arrives from wave 50

What it does
Scorches each nearby tower once for up to 50% max HP within 1.5 tiles.
How to counter
Warning! Scorch Colossus scorches nearby Towers as it advances. Bomb and Airstrike deal multiplied damage; Mega Bomb damage is capped.
Advice
Bomb and Airstrike deal bonus damage. Mega Bomb uses its own damage cap. Brace protects Towers from burns.
Tactics
Appears every 25 waves from wave 50 with a reduced escort wave. A Mega Boss that reaches the Firewall costs 3 integrity. From Wave 200, each Mega Boss encounter adds an elite lieutenant 10 combat seconds after the Mega Boss arrives. Lieutenants have 50% extra health and rotate REDLINE, WARLINK, Phase Cloaker, then Line Breaker. Defeat the Mega Boss and lieutenant to earn their combined bounty and one Mega Bomb reward. An escaped boss forfeits that encounter reward, and a lieutenant that reaches the Firewall costs 2 integrity.
  • Critical: Scorches towers Damages every nearby tower once for up to 50% max health.
  • Critical: Best response Bomb and Airstrike deal 2× damage; Mega Bomb uses its own percentage.
  • Warning: Plan for A reduced escort wave still arrives with the Colossus.
Durability [log]
Mobility
Bounty
Scales with wave
Size
1.48 tiles
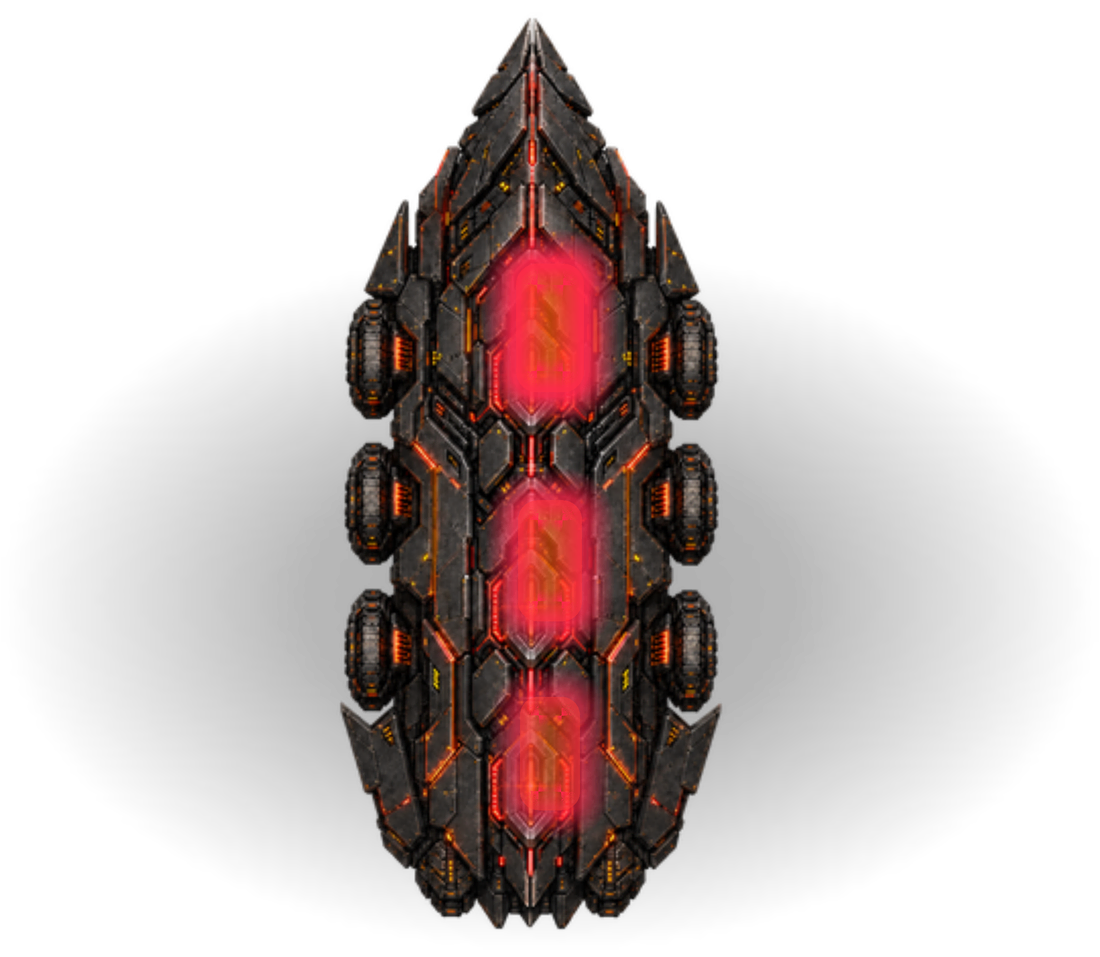
Coilbreaker, rendered from the game: a long armored hull with three glowing red cores along its spine.
Mega Boss Serpentine

Mega Boss 02 / 07 Debut Wave 50

Coilbreaker

Mega Boss • Backlash

Strikes Towers when it leaves a Choke Point.

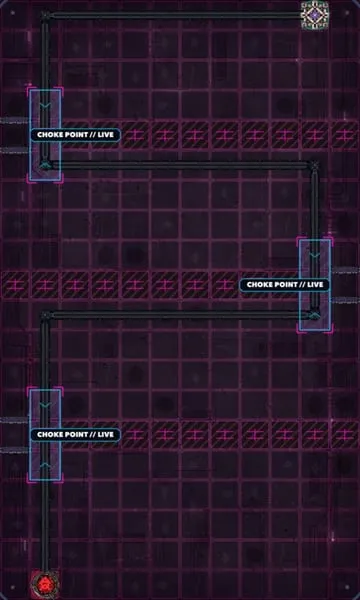
Serpentine battlefield, captured from the game: the empty board with its route and choke points.

Guards battlefield 02

Serpentine

Switchback Gauntlet · arrives from wave 50

What it does
Opens three cores while crossing active Choke Point zones and takes 2× damage there. Exiting a Choke Point discharges 65% max-HP damage into nearby Towers.
How to counter
Concentrate fire while its three cores glow yellow-white, then keep damaged Towers clear of the next backlash zone.
Advice
Attack while its cores glow inside a Choke Point. Use Brace before it exits to protect nearby Towers.
Tactics
Its three predictable discharge points turn Serpentine’s best firing positions into temporary danger zones. A Mega Boss that reaches the Firewall costs 3 integrity. From Wave 200, each Mega Boss encounter adds an elite lieutenant 10 combat seconds after the Mega Boss arrives. Lieutenants have 50% extra health and rotate REDLINE, WARLINK, Phase Cloaker, then Line Breaker. Defeat the Mega Boss and lieutenant to earn their combined bounty and one Mega Bomb reward. An escaped boss forfeits that encounter reward, and a lieutenant that reaches the Firewall costs 2 integrity.
  • Critical: Choke vulnerability Yellow-white cores take 2× damage.
  • Critical: Seismic backlash Each choke exit deals 65% max-HP damage nearby.
  • Tip: Best response Focus fire in the choke; repair before the next exit.
Durability [log]
Mobility
Bounty
Scales with wave
Size
1.55 tiles
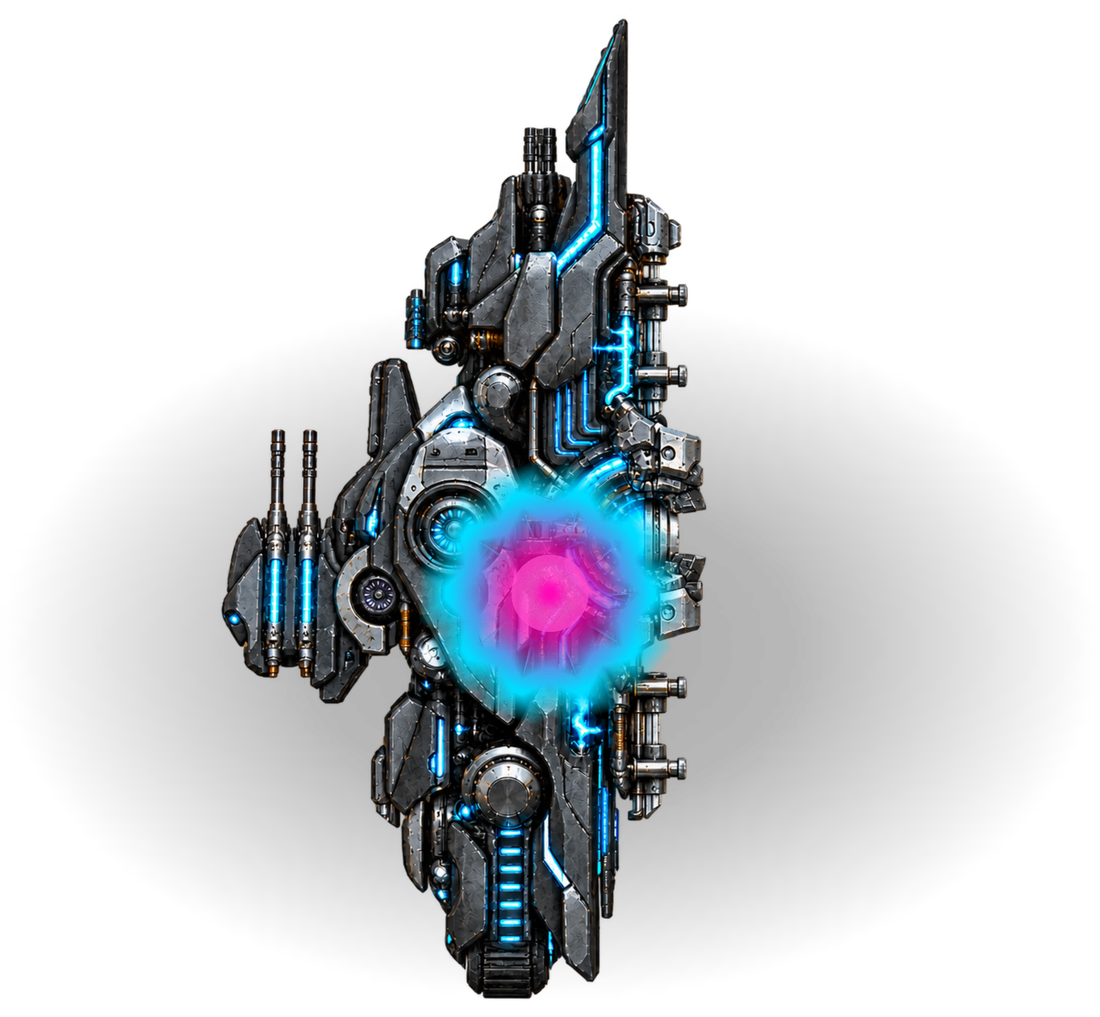
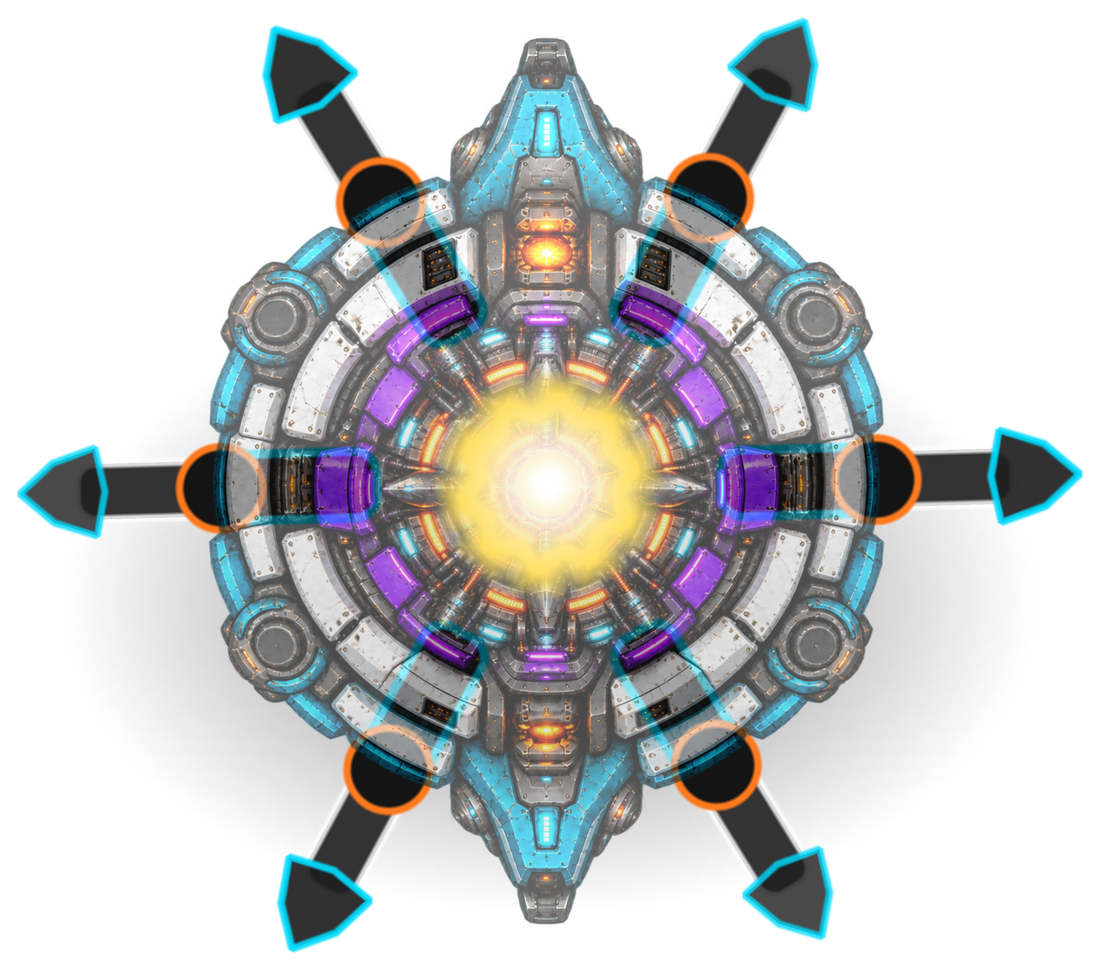
The Dyad, rendered from the game: the Alpha frame, a narrow half-hull trimmed in cyan around a magenta-and-cyan core.
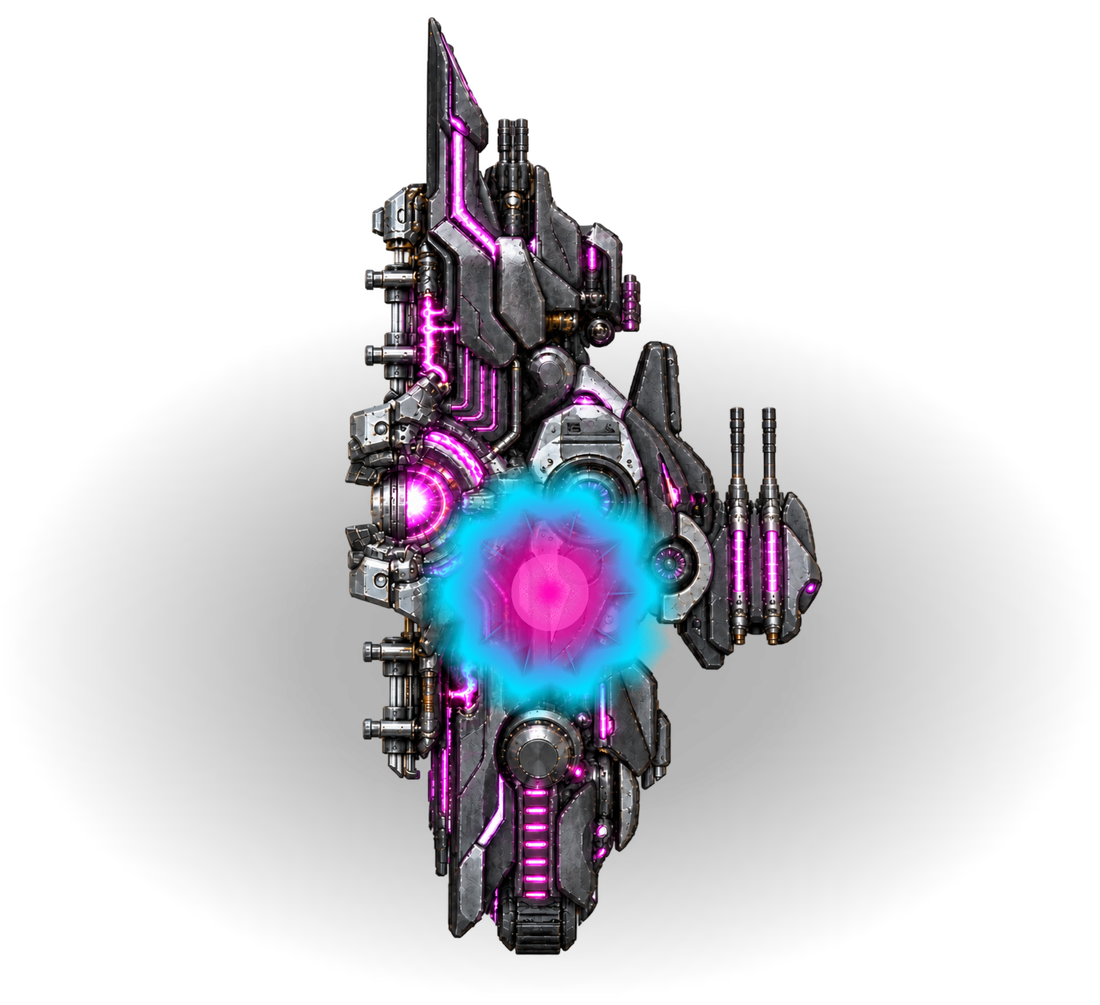
The Dyad (omega frame), rendered from the game: the Omega frame, the mirrored half-hull trimmed in magenta around the same core.
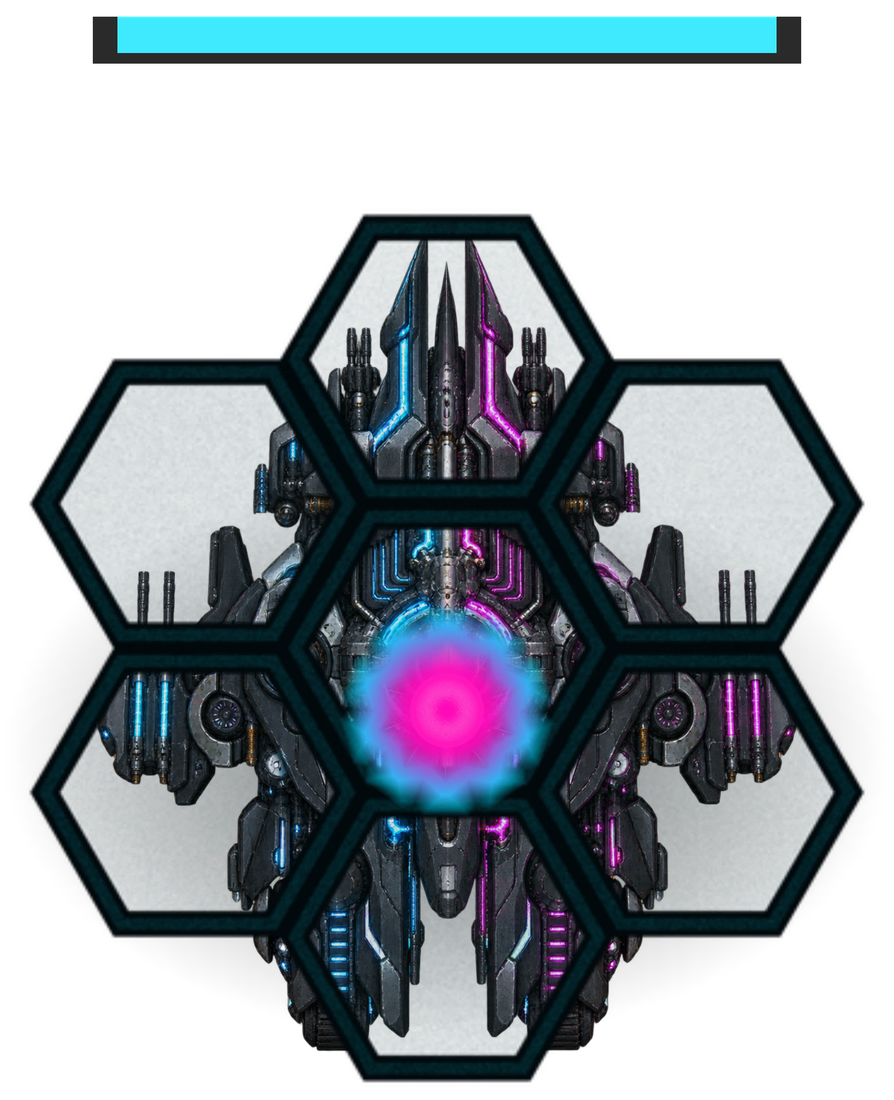
The Dyad (fused), rendered from the game: both frames fused into one wide hull around a single magenta-and-cyan core.
Mega Boss Twin Gates
In-game renders of each state the export draws: alpha frame, omega frame, fused.
Show The Dyad art

Mega Boss 03 / 07 Debut Wave 50

The Dyad

Mega Boss • Dual Frame

Two linked frames attack both gates, then fuse.

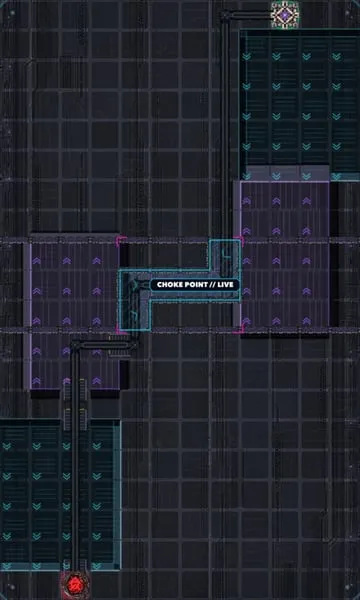
Twin Gates battlefield, captured from the game: the empty board with its route and choke points.

Guards battlefield 03

Twin Gates

Dual-Front Defense · arrives from wave 50

What it does
Sends one linked frame through each Twin Gate. If both reach the central bowl, they fuse their remaining health, gain a 18%+ shield by tier, and move 15% faster.
How to counter
Destroy either frame to deny convergence. Slow effects delay the rendezvous; Bomb and Airstrike deal multiplied damage.
Advice
Destroy either half before they meet in the center. Use slows and damaging Supplies to stop the merge.
Tactics
The encounter bar combines both frames. Damage on either lane reduces the same total threat before fusion. A Mega Boss that reaches the Firewall costs 3 integrity. Its two frames share that cost: 3 in total, fused or apart. From Wave 200, each Mega Boss encounter adds an elite lieutenant 10 combat seconds after the Mega Boss arrives. Lieutenants have 50% extra health and rotate REDLINE, WARLINK, Phase Cloaker, then Line Breaker. Defeat the Mega Boss and lieutenant to earn their combined bounty and one Mega Bomb reward. An escaped boss forfeits that encounter reward, and a lieutenant that reaches the Firewall costs 2 integrity.
  • Critical: Two gates Alpha and Omega deploy together with one combined threat bar.
  • Critical: Convergence If both survive to the bowl they fuse and gain at least 18% overshield.
  • Tip: Best response Destroy either frame before contact; slows extend the split phase.
Durability [log]
Mobility
Bounty
Scales with wave
Size
1.58 tiles
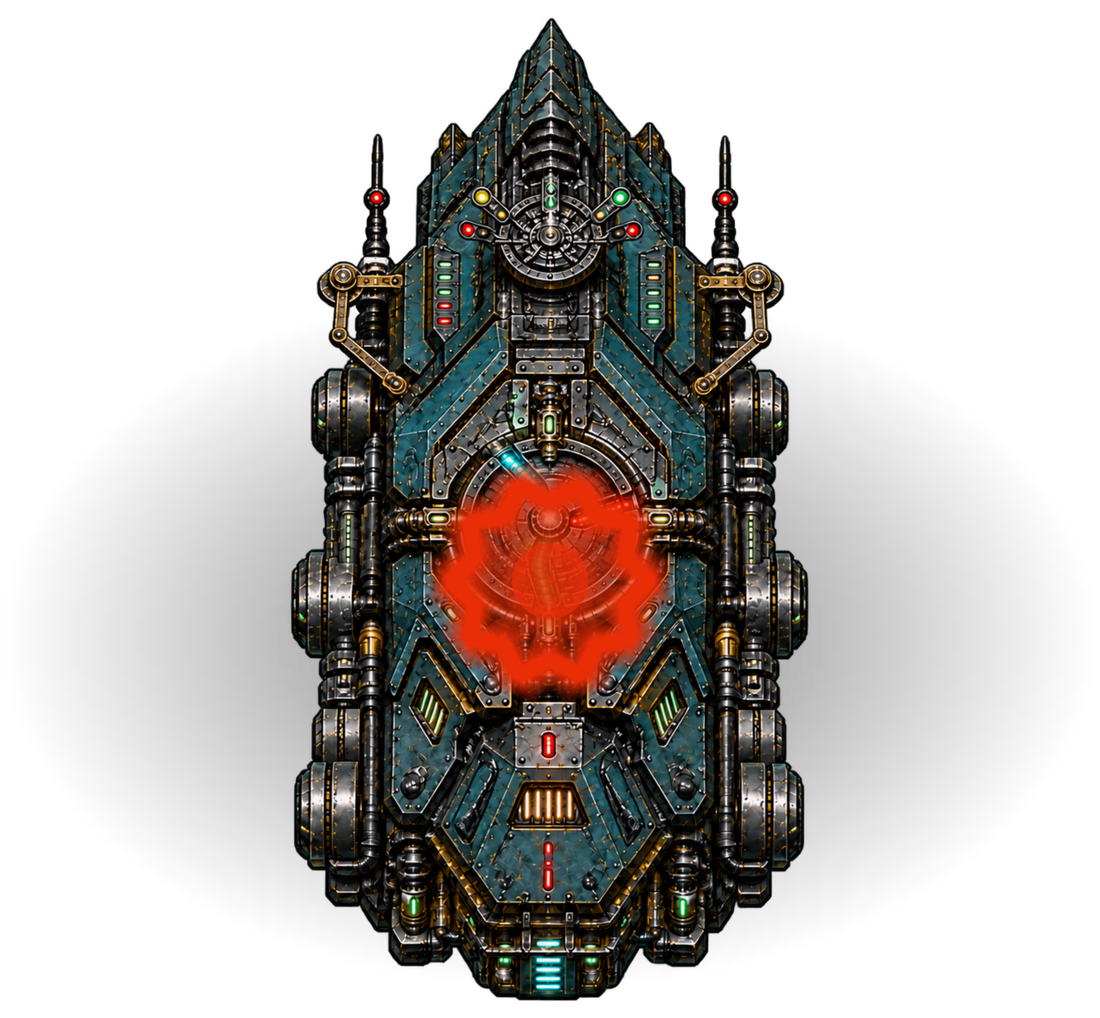
Deadlock Engine, rendered from the game: a long hull of teal armor plates with a red gear-shaped core.
Mega Boss Switchyard

Mega Boss 04 / 07 Debut Wave 50

Deadlock Engine

Mega Boss • Gate Override

Seizes the active blast gate during Override.

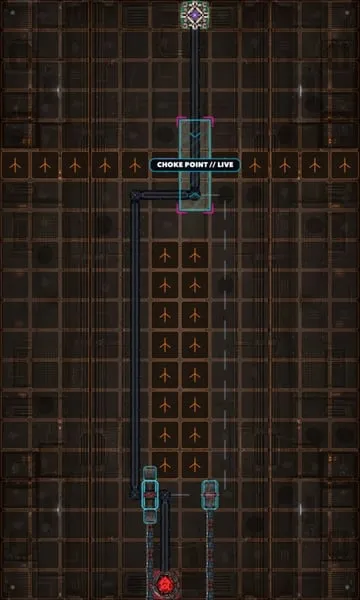
Switchyard battlefield, captured from the game: the empty board with its route and choke points.

Guards battlefield 04

Switchyard

Blast-Gate Control · arrives from wave 50

What it does
At tier-specific health thresholds, targets the active blast gate for 3.1/2.7/2.3s on Tier I/II/III. A manual divert exposes its core for 5.5/5/4.5s at 155% damage; a miss seizes that gate and grants 25% speed.
How to counter
Keep the alternate gate cooled and selectable. Divert only during the orange Override warning, then focus fire the cyan core; Bomb and Airstrike still deal multiplied damage.
Advice
Tap the other gate during the Override warning, then attack the exposed core.
Tactics
Higher tiers add more Override windows, shorten the warning, and make a missed divert more dangerous. An automatic heat handover counts as a miss. A Mega Boss that reaches the Firewall costs 3 integrity. From Wave 200, each Mega Boss encounter adds an elite lieutenant 10 combat seconds after the Mega Boss arrives. Lieutenants have 50% extra health and rotate REDLINE, WARLINK, Phase Cloaker, then Line Breaker. Defeat the Mega Boss and lieutenant to earn their combined bounty and one Mega Bomb reward. An escaped boss forfeits that encounter reward, and a lieutenant that reaches the Firewall costs 2 integrity.
  • Critical: Override warning Orange link targets the currently open blast gate.
  • Tip: Core exposure Tier I/II/III manual diverts open 5.5/5/4.5s cyan damage windows.
  • Warning: Failure A miss locks the gate and accelerates the Engine.
Durability [log]
Mobility
Bounty
Scales with wave
Size
1.6 tiles
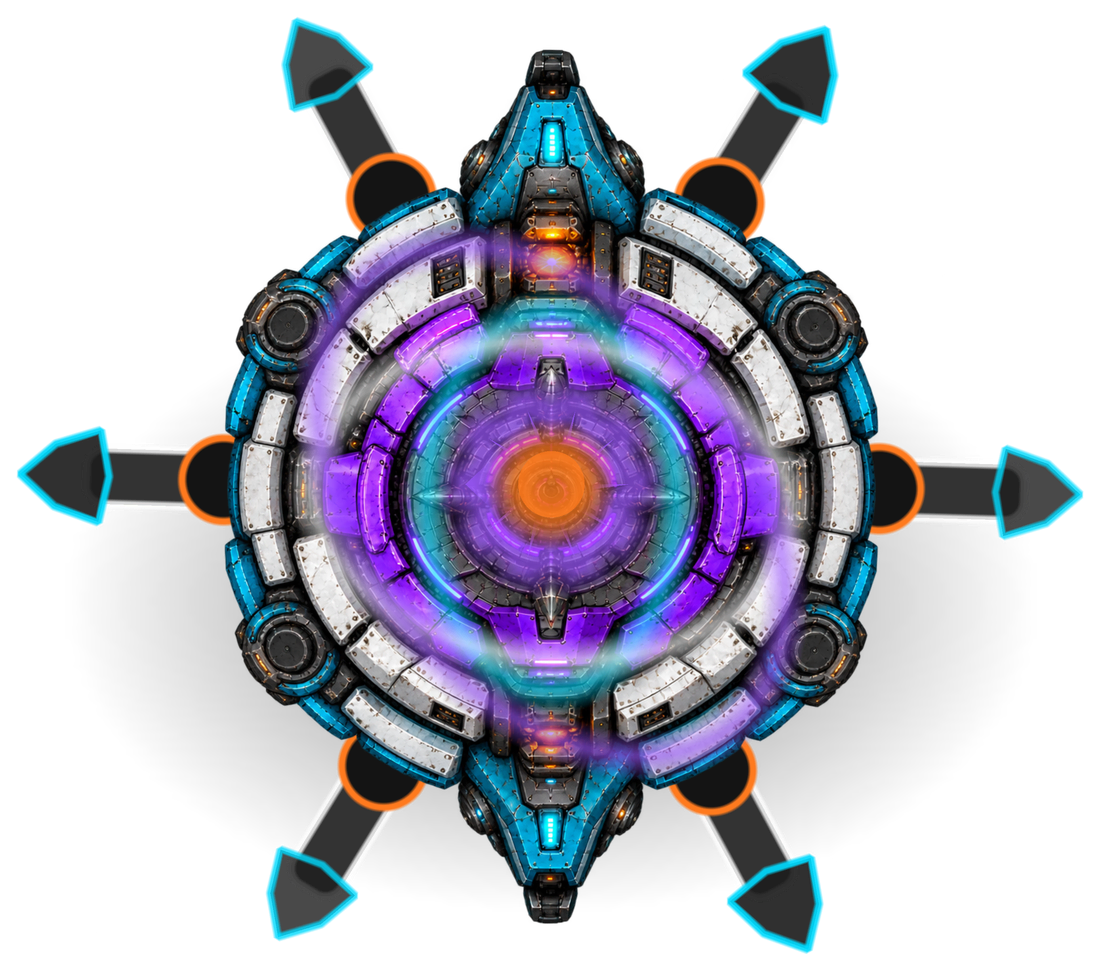
Strata Warden, rendered from the game: a round fortress ringed in white contour plates and violet light, with six cyan-tipped arms.
Strata Warden (core exposed), rendered from the game: the same fortress with two contour plates broken away and its core blazing white-gold.
Mega Boss Ridgeline
In-game renders of each state the export draws: contour armor, core exposed.
Show Strata Warden art

Mega Boss 05 / 07 Debut Wave 50

Strata Warden

Mega Boss • Contour Armor

Has separate armor plates for shots fired from each ground elevation.

Ridgeline battlefield, captured from the game: the empty board with its route and choke points.

Guards battlefield 05

Ridgeline

Tiered Defense · arrives from wave 50

What it does
Calibrates separate armor plates against LOW, STANDARD and ELEVATED fire. Break two different plates inside the Tier I/II/III rebuild window (8/7/6s) to expose the core for 7/6/5s at 155% damage.
How to counter
Build overlapping fire from at least two elevations. Damaging Supplies bypass the contour plates. Bomb and Airstrike receive the Mega Boss damage bonus; Mega Bomb uses percentage damage.
Advice
Build Towers on at least two elevations. Break two plates close together to expose its core.
Tactics
Do not stack every tower on the premium ridge. Hold a cross-elevation burst for the first plate break, then switch focus before it rebuilds. A Mega Boss that reaches the Firewall costs 3 integrity. From Wave 200, each Mega Boss encounter adds an elite lieutenant 10 combat seconds after the Mega Boss arrives. Lieutenants have 50% extra health and rotate REDLINE, WARLINK, Phase Cloaker, then Line Breaker. Defeat the Mega Boss and lieutenant to earn their combined bounty and one Mega Bomb reward. An escaped boss forfeits that encounter reward, and a lieutenant that reaches the Firewall costs 2 integrity.
  • Critical: Three plates Low, Standard and Elevated fire damage matching contour armor.
  • Critical: Contour lock Tier I/II/III: break two different plates within 8/7/6s.
  • Tip: Best response Cross-elevation fire opens the core; damaging Supplies bypass armor.
Durability [log]
Mobility
Bounty
Scales with wave
Size
1.62 tiles
Faultmason, rendered from the game: a heavy cross-shaped hull with a burning orange core and flame vents on each arm.
Mega Boss Faultline

Mega Boss 06 / 07 Debut Wave 50

Faultmason

Mega Boss • Seismic Claim

Marks a Tower before the wave to gain a shield and disable that Tower.

Faultline battlefield, captured from the game: the empty board with its route and choke points.

Guards battlefield 06

Faultline

Seismic Crossings · arrives from wave 50

What it does
Marks one weapon Tower during preparation. If it remains on the claimed tile, Faultmason gains at least 12% overshield and suppresses that Tower for 6s on first entering the Choke Point.
How to counter
Move or sell the marked Tower before the wave begins. Vacating the tile permanently denies both parts of Seismic Claim for that encounter.
Advice
Move or sell the marked Tower before the wave starts to prevent both effects.
Tactics
Only one Tower is claimed. On higher tiers, the shield is stronger and the marked Tower stays offline longer. A Mega Boss that reaches the Firewall costs 3 integrity. From Wave 200, each Mega Boss encounter adds an elite lieutenant 10 combat seconds after the Mega Boss arrives. Lieutenants have 50% extra health and rotate REDLINE, WARLINK, Phase Cloaker, then Line Breaker. Defeat the Mega Boss and lieutenant to earn their combined bounty and one Mega Bomb reward. An escaped boss forfeits that encounter reward, and a lieutenant that reaches the Firewall costs 2 integrity.
  • Critical: Seismic claim One weapon Tower is marked during Mega Boss preparation.
  • Tip: Deny the claim Move or sell the marked Tower before the wave begins.
  • Warning: If ignored Faultmason gains a shield and shuts that Tower down for at least 6s at the Choke Point.
Durability [log]
Mobility
Bounty
Scales with wave
Size
1.62 tiles
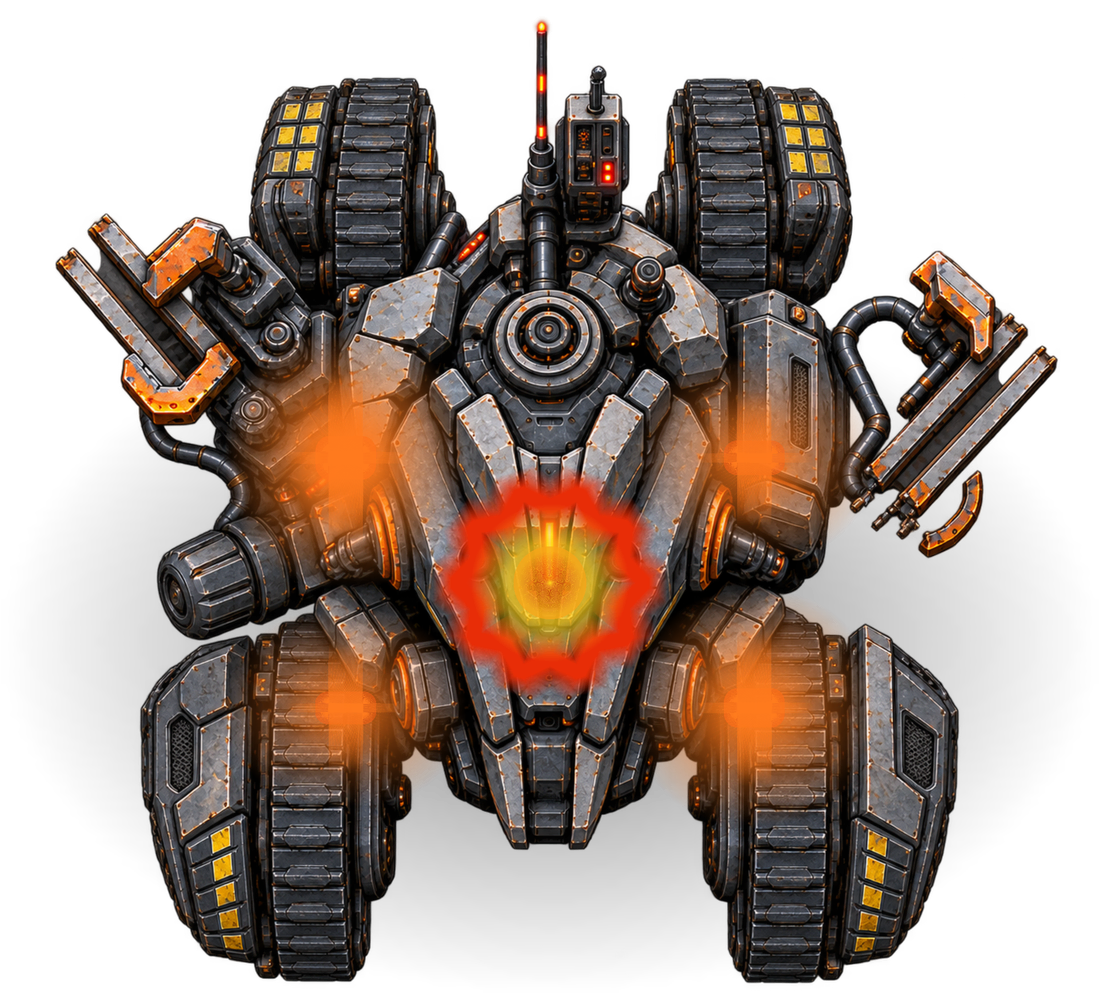
Railjack, rendered from the game: a tracked heavy chassis with claw arms, amber lights and an orange-glowing core.
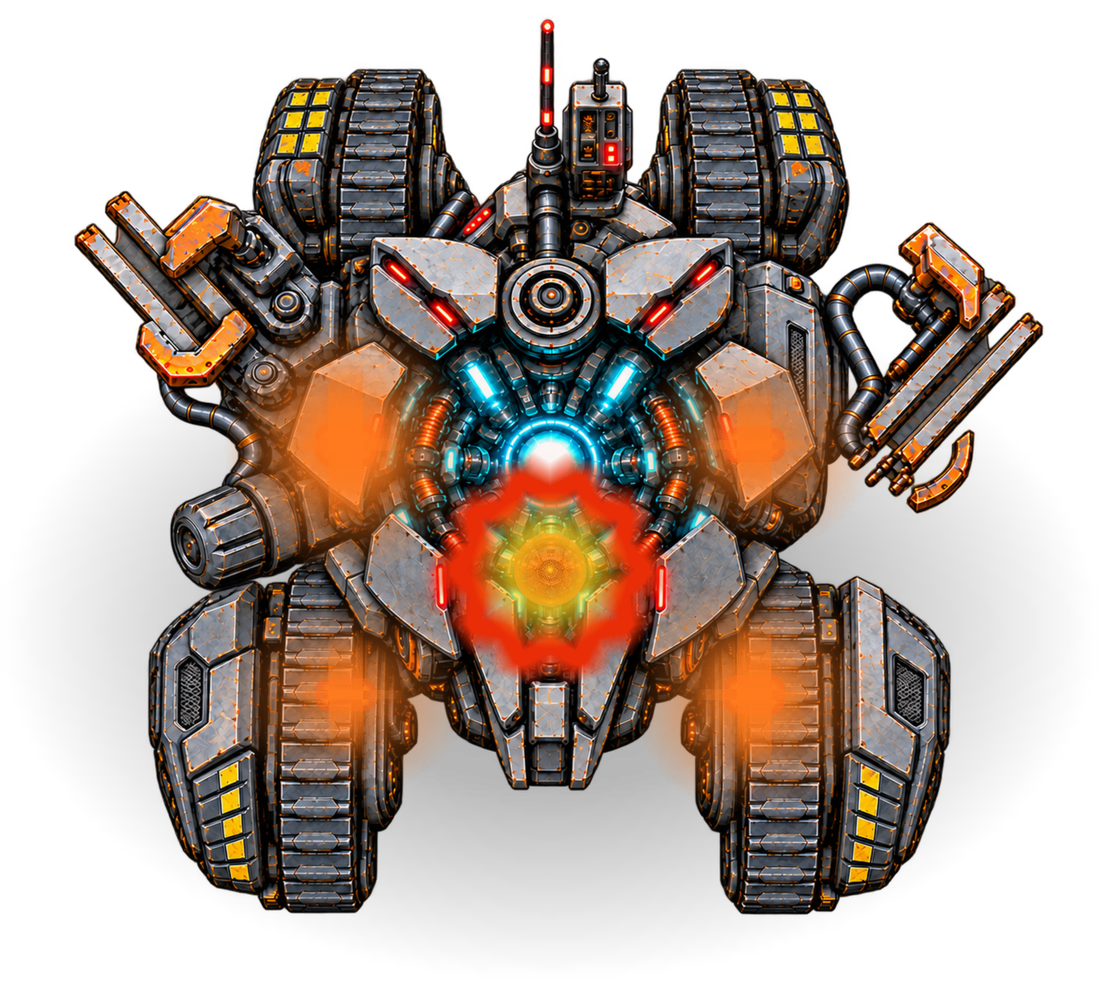
Railjack (core exposed), rendered from the game: the same chassis with its armor opened and a cyan core showing inside the orange glow.
Mega Boss Evacuation
In-game renders of each state the export draws: armored, core exposed.
Show Railjack art

Mega Boss 07 / 07 Debut Wave 50

Railjack

Mega Boss • Bilateral Lock

Its armor is linked to a Lockrunner on each front.

Evacuation battlefield, captured from the game: the empty board with its route and choke points.

Guards battlefield 07

Evacuation

Mobile Command · arrives from wave 50

What it does
Takes 35% damage while armored. Destroy both Lockrunners before they leave their matching permanent Chokes, within the link window, to burn a circuit and expose the core at 155% damage.
How to counter
Killing a runner after its Choke ends, letting one leak, or missing the timer resets that pair. Tiers I/II/III need one/two/three successful pairs. The final exposure lasts for the fight.
Advice
Kill each Lockrunner before its Choke ends, with both kills inside the link timer.
Tactics
Lockrunners pay no bounty and fill no meters. Split fire across both fronts, then focus RAILJACK when its core is exposed. A Mega Boss that reaches the Firewall costs 3 integrity. From Wave 200, each Mega Boss encounter adds an elite lieutenant 10 combat seconds after the Mega Boss arrives. Lieutenants have 50% extra health and rotate REDLINE, WARLINK, Phase Cloaker, then Line Breaker. Defeat the Mega Boss and lieutenant to earn their combined bounty and one Mega Bomb reward. An escaped boss forfeits that encounter reward, and a lieutenant that reaches the Firewall costs 2 integrity.
  • Critical: Armored Takes 35% damage until a bilateral key pair succeeds.
  • Critical: Turn both keys Kill both Lockrunners before their matching Chokes end and the link timer expires.
  • Tip: Core window Successful pairs expose the core at 155%; the last circuit leaves it permanently open.
Durability [log]
Mobility
Bounty
Scales with wave
Size
1.66 tiles
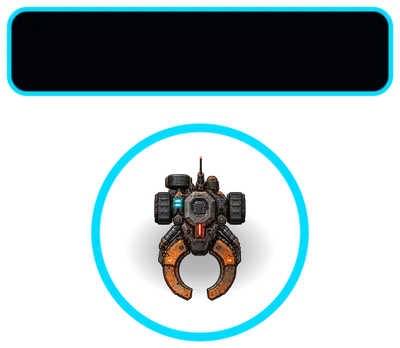
Lockrunner (west front), rendered from the game: a small tracked unit with an orange horseshoe clamp and a cyan lamp on its west side.
West front
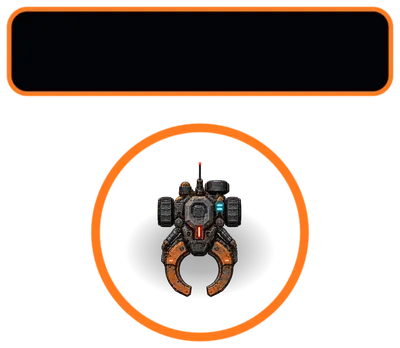
Lockrunner (east front), rendered from the game: the same unit with its cyan lamp on the east side.
East front

Encounter unit · with Railjack

Lockrunner

Boss Key • Dual Front

Carries one of Railjack’s armor locks.

One deploys on each EVACUATION front. Kills before or inside its matching permanent Choke count; kills after it leaves do not.

Pays 0G and never fills Choke Control, Supply or bonus meters. It exists only to unlock RAILJACK armor.

Coming November 2026 for iPhone and iPad

Now build the answer

Ten towers, one route and a choke point to hold. See what each tower counters.

Next // Field Guide Towers All ten towers, with stats at every upgrade level.